[home] [readme] [integration] [getting-started] [manual] [more]
Getting Started
Introduction
If you are coming to labwc for the first time, this is the page to read. Should you get stuck, do reach out on the IRC Channel or Github Discussions.
Context
Labwc is a system level software component for which the entry barrier is higher compared with that of many user applications. It can be perceived as difficult to set up due to the need for manual configuration and because it is a base component upon which Desktop Environments can be built which means that there are many ways in which it can be used and that work is required to get the best out of it. But fret not, with a small amount of work some very creative experiences will be opened up that will most likely be worth the effort.
Pre-configured Desktop Environments
exist using labwc as the compositor, but in this document
you will be guided to start the compositor without any such setup.
Installation
Install labwc with your package manager and come back
here when done.
Also install alacritty (a terminal emulator which is
available in most distros’ repositories). There is of course nothing
forcing you to use alacritty but it is likely to be useful
the first time the start the compositor.
Launching
Launch labwc by typing labwc in your terminal. Some
Display Managers (like SDDM or GDM) will show
labwc, so you can also start from there.
TECHNICAL NOTE: labwc can be started from a TTY or nested in a Wayland/X11 session.
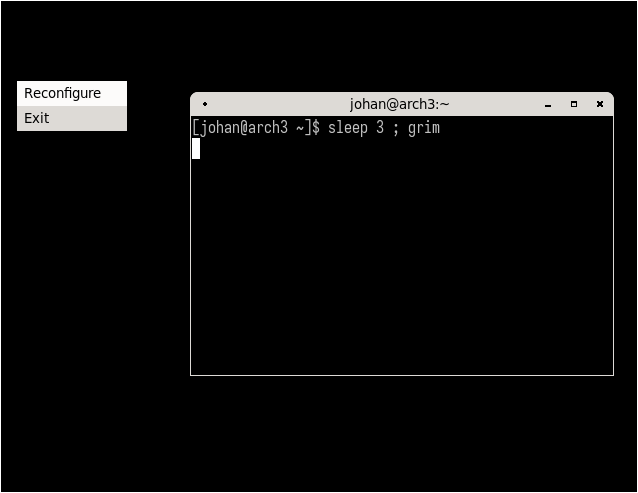
If you start labwc with no prior configuration you will
be greeted by a blank screen. If you click on the desktop you will see
your root-menu containing only ‘Reconfigure’ and ‘Exit’ (and ‘Terminal’
from version 0.9.0 onwards). Do not be put off by this sparse
appearance. There is a lot more to this compositor than first meets the
eye.
You can start a terminal by pressing Super + Return.

Configuration
Configuration files are located in
$HOME/.config/labwc/
In this guide we are going to cover some common setup steps which will give you a good feel for the four most important configuration files which are: environment, rc.xml, autostart and menu.xml.
Whenever a configuration or theme file has been changed, the command
labwc --reconfigure has be run for the settings to take
affect. With additions to autostart you will need to
re-start the compositor.
It is generally recommended not to copy the example configuration files, but to build them from scratch.
Step 1 - Set your keyboard layout
Set the environment variable XKB_DEFAULT_LAYOUT with
your country code in ~/.config/labwc/environment.
For example to use a Swedish keyboard layout, add this line:
XKB_DEFAULT_LAYOUT=seIf you are unsure what your country code is, use the website xkeyboard-config.freedesktop.org
or search the ‘layout’ section of your local copy of
evdev.lst which is typically located at
/usr/share/X11/xkb/rules/evdev.lst.
See further details, see environment and xkeyboard-config(7).
Step 2 - Set some keybinds
If you want to bind a key-combination to an application like a
launcher or terminal, create a configuration file
~/.config/labwc/rc.xml and add a
<keyboard> section as shown below.
<?xml version="1.0" ?>
<labwc_config>
  <keyboard>
    <default />
    <!-- The W- prefix refers to the Super key -->
    <keybind key="W-d">
      <action name="Execute" command="sakura" />
    </keybind>
    <keybind key="W-z">
      <action name="Execute" command="wofi --show drun" />
    </keybind>
  </keyboard>
</labwc_config>
TECHNICAL NOTE: The
<default/>element includes all the built-in keybinds as described here.
See rc.xml for all available configuration options.
To figure out the name of a key, you can use either xev (widely available, runs via xwayland) or wev. Alternatively, search for keysym names directly in xkbcommon-keysyms.h.
Step 3 - Use a wallpaper and a panel
We recommend using swaybg for setting a background image
or color. You can of course run swaybg directly from a
launcher or panel, but for persistence add the example line below to
~/.config/labwc/autostart
swaybg -c '#334455' &…or for an image try something like this:
swaybg -i ~/Pictures/wallpaper.png &IMPORTANT: The
&at the end is needed to prevent the compositor getting stuck on that line.
There are many widely packaged bars and panels that can be used with
labwc, for example xfce4-panel,
lxqt-panel, waybar and sfwbar.
Just take a pick and add one to your
~/.config/labwc/autostart like this:
xfce4-panel &See further examples in autostart
Step 4 - Build a root-menu
Whether or not you take this step really comes down to how you want
to use the compositor. For example, if you prefer to use a desktop
client like xfdesktop or pcmanfm-qt --desktop
which provide their own root menus.
To handcraft a menu, create a ~/.config/labwc/menu.xml
and populate with your favourite applications as in the example
below:
<?xml version="1.0" ?>
<openbox_menu>
<menu id="root-menu" label="">
  <item label="Web browser"><action name="Execute" command="firefox"/></item>
  <item label="Terminal"><action name="Execute" command="alacritty"/></item>
  <item label="Reconfigure"><action name="Reconfigure"/></item>
  <item label="Exit"><action name="Exit"/></item>
</menu>
</openbox_menu>
A lot can be done with the compositor menu. See integration#menu-generators and menu.xml for ideas on how to automatically create menu.xml files as well as creating pipemenus.
Refer to the man pages for full documentation.
Enjoy!